Train Simulator Controller
Train Simulator Controller: July 2026 Progress Roundup
By Christopher Mitchell, Ph.D. | Published July 26, 2026
For more than three years, I have been transforming a portion of my apartment into a physical train simulator. The project is a faithful recreation of the UK Class 80x passenger train (which encompasses the Class 800, 801, 802, 805, and 810 variants).
My primary goal is the high-fidelity replication of the cab's instruments and controls. To achieve this, I utilize a hybrid approach:
- Sourcing authentic components where possible.
- Engineering custom replicas when originals are unavailable.
This journey has led me deep into various technical "rabbit holes," ranging from the fabrication of the physical mounting panels to the development of a custom CAN bus transceiver board and its accompanying daughterboards to integrate the entire system.
While I typically reserve blog updates for the completion of a specific module, the last six months have seen simultaneous progress across several fronts. Consequently, this post serves as a general status report.
💡 The Headlight Control Panel
The headlight assembly is one of the most intricate sections of the Class 800 dashboard that requires a custom-built solution.
Functional Requirements
The real-world interface consists of:
- A six-position selector knob (managing head and tail light configurations).
- A momentary push-button for flashing hazard lights.
- An LED-based schematic of the train's front end to provide visual feedback on the current lighting state.
Engineering Process
To implement this, I designed a custom PCB that serves a dual purpose: it houses the red and white surface-mount LEDs and functions as a daughterboard for the CAN bus transceivers, providing terminals for the switch and button.
Development Checklist:
- Test 3 different white LED variants for luminosity.
- Test 3 different red LED variants for luminosity.
- Iterate PCB layout (2 versions) for optimal dimensions.
- Order frosted white diffusers from JLC (manufactured as a single "spidery" web).
- Fabricate a custom 6-position selector switch.
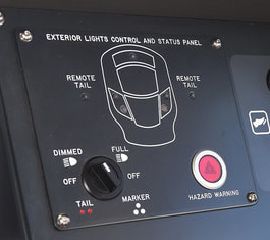 The target: Headlight control panel on a Class 800 EMU
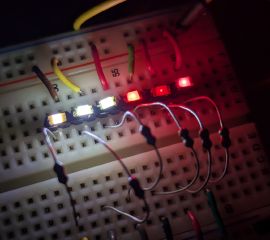 Comparing LED brightness for the preview display
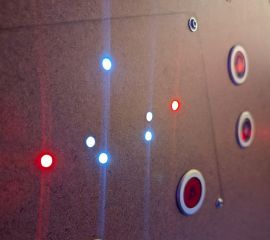 Integration testing LEDs within a hardboard prototype
Technical Hurdles
The most frustrating challenge was the selector switch. Despite having the exact manufacturer and part number, new units are only sold in expensive bulk quantities. After several unsuccessful attempts on eBay, I eventually managed to source the necessary parts to build a replica that matches the prototype's specifications.
Software Integration: I have tested the panel with Train Simulator and Train Sim World. However, I've encountered a limitation: Train Sim World does not currently expose the output state of the dashboard indicators, making bidirectional feedback difficult.
🛠️ Sheet Metal Panels and Labeling
Previously, I utilized a hardboard prototype for the center panel and the overall four-section driver's control setup. While this validated the ergonomics and layout, it had two major flaws: it was too fragile for long-term use and looked unconvincing (some observers mistook it for cardboard).
The Transition to Steel
To professionalize the build, I transitioned to sheet metal. I began with a pilot project: the TPWS (Train Protection & Warning System) and DRA (Driver's Reminder Appliance) panels.
With the expertise of Tim Keller (geekboy1011), we employed laser engraving and painting. The result was a durable, prototypical finish protected by a clear coat.
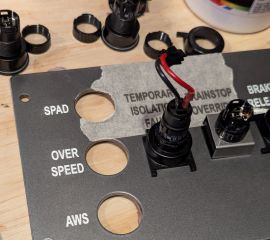 Applying labels to the TPWS panel
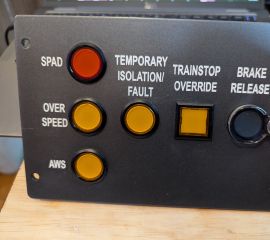 The finished TPWS control panel
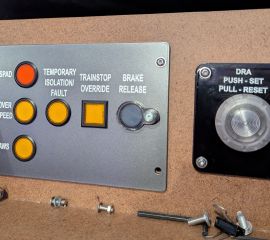 Installed TPWS and DRA panels
Comparison: Hardboard vs. Sheet Metal
| Feature | Hardboard Prototype | Powder-Coated Steel |
|---|---|---|
| Durability | Low (Fragile) | High (Robust) |
| Aesthetics | "Cardboard-like" | Professional/Prototypical |
| Flex | Noticeable | Minimal |
| Weight | Light | Heavy |
Because of the significant weight increase, I've realized my current MDF/hardboard supports are insufficient. I can express the weight delta as: Consequently, I need to upgrade the backing to sturdy plywood.
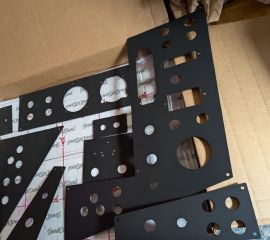 The new sheet metal replacements
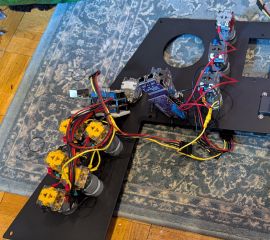 Populating the right-hand panel with components
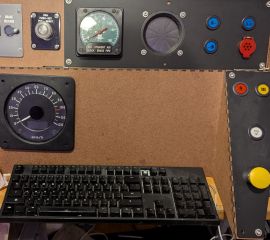 The center panel in a transitional state
The Labeling Crisis
While the TPWS panels (semi-gloss/gloss) worked well, the remaining panels were powder-coated in matte black. I discovered a frustrating chemical interaction: white acrylic paint does not wipe off cleanly from matte powder coating; instead, it seeps into the texture.
I am currently searching for a new fabrication method to label these panels without discarding the existing hardware.
Laser-cutting the headlight diagram
Comparison of panel materials
Failed attempts at painting the matte surfaces
🌻 Other Updates
One of the first authentic instruments I successfully integrated into the simulator was the AWS Sunflower...
(Note: Article content ends here)